It may seem daunting, but replacing the fuse box is not a big drama. At some point a damaged fuel pump relay caused some minor melting damage to my fuse board. I decided to replace it to be safe. The rear of the fuse box just consists of a series of different sized sockets and plugs - most plugs will only fit into 1 socket so it's hard to mix them up.
You'll need
Safety first - disconnect the negative terminal. There is a simple card cover over the fuses clipped onto the kickboard. Remove this - it just unclips.
The fuse board is held in place by 2 metal hooks either side of the box and a single screw at the bottom. Undo the screw and unhook the fuse box, letting it dangle.

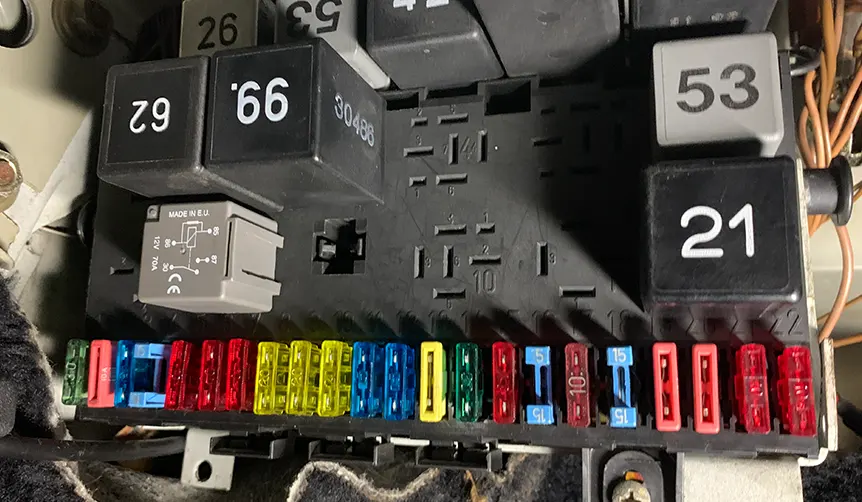
If your car is like mine - a late model Cabriolet - there may be a seperate row of relays clipped to the top of the fuse box. Unclip these but don't unplug them. There are small tabs at the back of each that clip them into place. Use a small screw driver to unclip them from the back and place the relays out of the way.
Take note of the order they appear in (to not have problems with stretched wiring later).

Place each relay and fuse in their respective positions on the new fuse box, keeping track of what goes where.
Depending on your model year and extras your car may have more or less fuses and relays than mine.

This is pretty easy as most of the sockets will only fit into 1 place at the back of the new fuse box. However, on my car at least, there were a couple of wires that could plug into multiple places. I used my phones camera to keep track of where they went.
With all the sockets free, the fuse box should now be easily removed altogether.

This is the reverse of step 5. Connect the sockets into their respective places in the back of the new fuse board. Ensure each connection is tight.
Clip the top row of fuses in place.
Hook the fuse box back on the two hooks under the dash and replace the screw.
Finally, replace the fuse box cover.
Test all the electrics to ensure they all work (fuel pumps, lights, horn, indicators, wipers, etc). Keep an eye out for any smoke or bad smells coming from the fuse box area.

The Mitsubishi 380 was a pretty decent car at a pretty decent price. So why did it fail?

If I were to walk into any Toyota dealership anywhere in the world what could I buy?

An honest review of owning a classically-styled Kawasaki W800 motorcycle for the last 10 years