You can use this as a guide for replacing either just the springs, shocks or both at the same time.
When to replace - Possible symptoms of a bad shock absorbers and springs
You'll need
Wind down the rear windows and open the rear hatch to provide access to the top of the shock absorbers. If you have a Cabriolet, lower the roof.
Loosen the lugnuts on the rear wheels, but do not remove them.
With the car parked on a level surface, raise the rear of the car on both sides, using jack stands to support it. Before starting, rock the car to ensure it is safe and steady on the stands.
With the car raised, remove both rear wheels.
Choose a side to start from.
From within the car, behind the rear seats, you'll see a rubber cone or cap covering the top of the strut tower. Remove this by simply pulling it off.
Beneath the rubber cap will be a nut, large conical washer and a rubber bush. Start by removing the nut. The shock absorber and spring assembly should drop a little from the top of the car, but not much.
The shock absorber is attached to the axle behind the rear wheel hub and drum brake with one large nut and bolt. Remove the nut and slide the bolt out - you'll need 2 spanners either side of the nut and bolt to do this.
Carefully allow the shock absorber to fall through the bracket slightly, resting on the lower seat spring. Be careful not to scratch up the paint on the shock absorber.
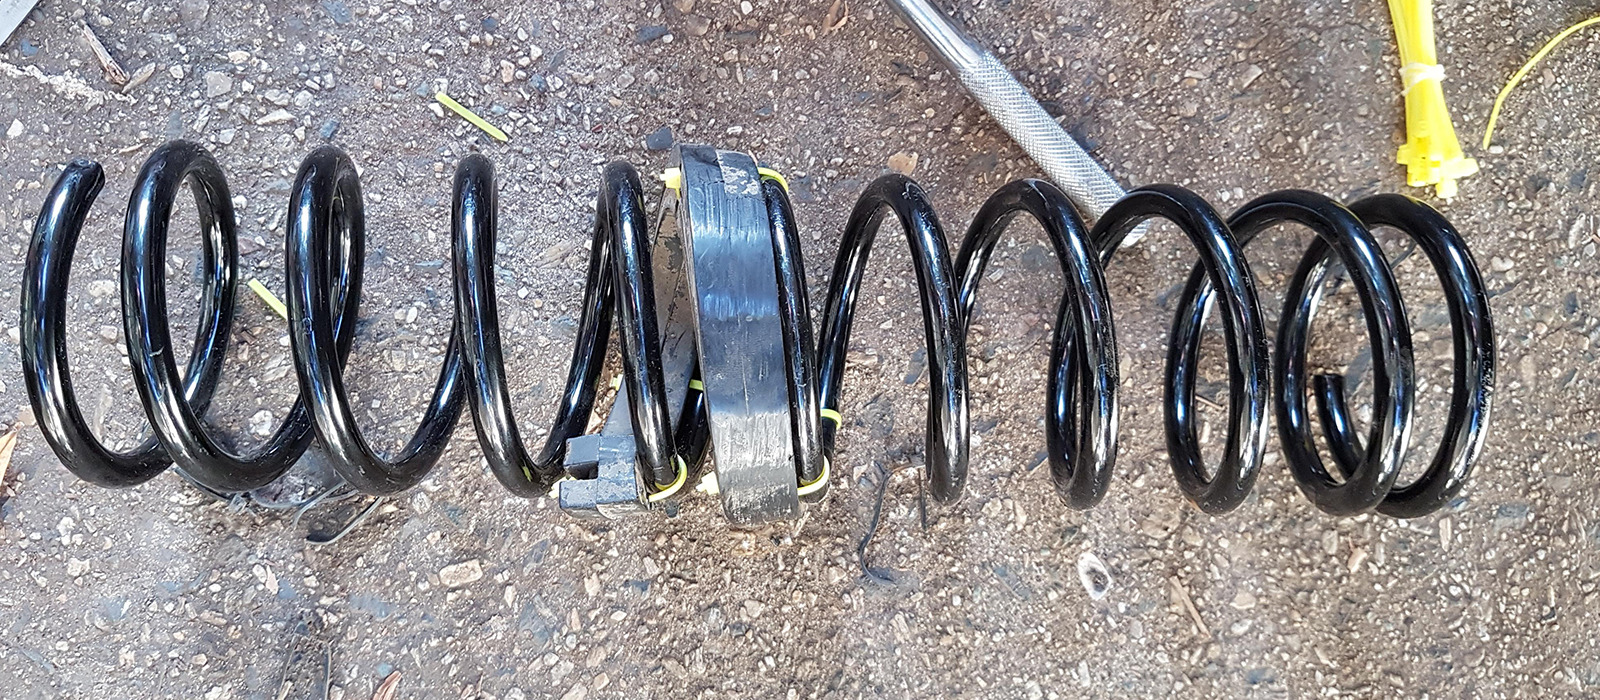
There is another rubber bush and a nut threaded on the top of the shock absorber. When tightened this compresses the spring between the two spring seats. To release pressure on the spring and remove it, we need to undo this.
First, remove the rubber bush - just pull it off. Then, slowly unscrew the nut. Note, when the nut is loose the spring will no longer be under pressure and will cause the nut and upper spring seat to pop up slightly. Even though the rear springs are not under very much pressure and are not dangerous be prepared for this.
Compress the shock absorber, with your hands, to make it as small as possible. To remove the spring you may need to wiggle and 'unscrew' it a little, manoeuvring it around the shock absorber. Be careful not to damage the thread on top of the shock.
With the spring removed you can also remove the old shock absorber to replace it.
The old springs on my car had a rubber pump stop attached to them with cable ties. I saw no harm in reusing them and decided to cable tie them to the new springs as well.
Set up the new spring by placing it over the top of the shock absorber, making sure to seat it properly.
Now, we'll need to extend the shock absorber back to its full height so we can re-attach the upper spring seat and compression nut. This can be a little tricky the with spring in place. I found I could get extra grip by screwing a nut to the top of the shock absorber and using a spanner to lever it up. Be careful not to damage the thread if doing this.
With the spring in place and the shock absorber fully extended place the upper spring seat, washers and rubber bush in place. Now, the problem is you probably wont be able to re-attach the compressor nut as the top of the shock absorber wont clear the un-compressed spring. We need to compress the spring a little so the top of the shock absorber pokes through, allowing us to attach the nut.
This is where a jack comes in handy. With the all of the components (washers, rubber bush, spring seat) in place, position a jack under the bottom of the shock absorber (use cloth or wood so as not to damage anything) and start raising the shock and spring assembly. Basically, you want to compress the spring between the jack and the strut tower, allowing the top of the shock to poke through the strut tower so you can thread the compressor nut on from inside the car. This is a little fiddly so take your time - a 2nd person to help is handy, but it can be done by yourself.
Once you've got the nut in place you can release the jack and tighten the nut from back inside the wheel well. Tighten it until it stops.
Now with the spring nicely compressed you can simply do the reverse of steps 2 and 3.
Replace the large bolt to the bottom of the shock absorber and axle.
Using the jack if need be, push the top of the spring assembly back through the strut tower and replace the rubber bush, washers and nut at, fastening it all in place. I used Loctite Blue for peace of mind.

Is a VW Mk1 Golf a reliable car? Can you daily drive it and what are common issues you might encounter?

How did a 50 year old Australian family wagon end up in India?

The Mitsubishi 380 was a pretty decent car at a pretty decent price. So why did it fail?